Creating your own video lessons – A useful website
Jonathan GelensAre you trying to find something to do at the end of the week? Or at the end of the day? Well, your problems may have been solved with this handy website.
I have used this website for a long time when I taught in Korea. At that time the website was dedicated to worksheets and PowerPoints only. However, recently they have added a new feature – Video lessons. Here teachers can take a video from YouTube and using this website teachers can embed questions for their students to watch and listen to.
Personally, I have used this with several classes either as a warmer to the week’s topic or as a final task. It’s up to you. I have also built classes around the video, using it to teach vocabulary or grammar and then leading into a reading or writing task. The video you chose can help to add something different to your lesson.
How does it work?
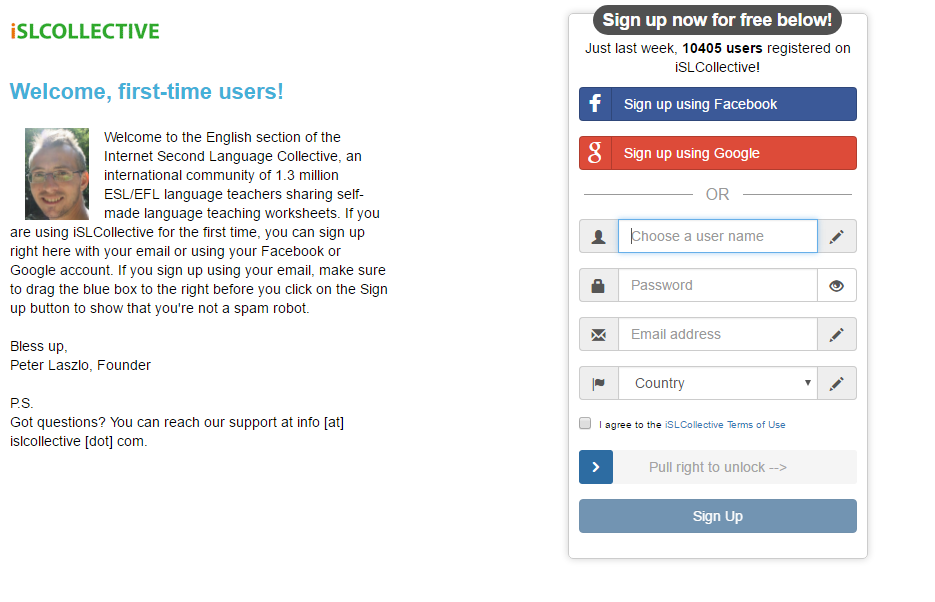
First, you will need to create an account. This website is totally free. It may ask you to upload a worksheet, but you don’t have to.
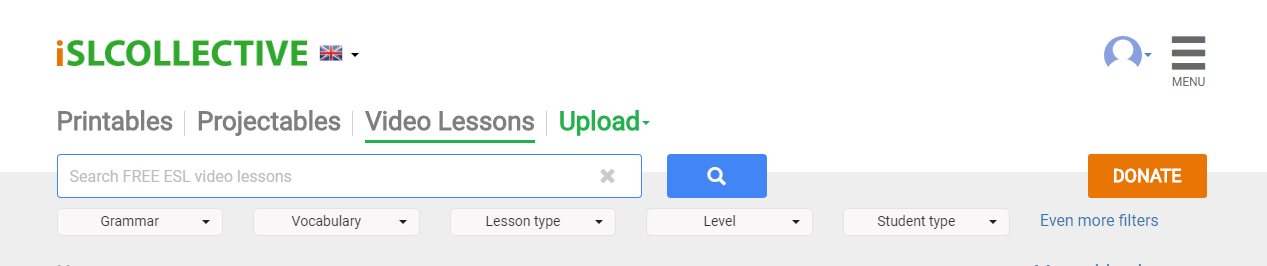
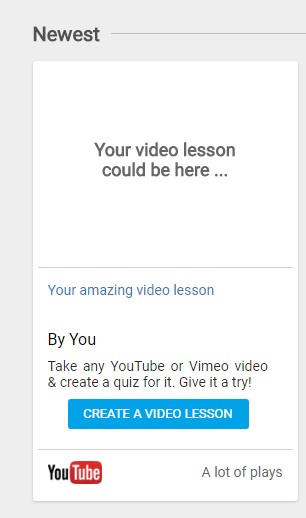
Once you have completed that then you can go to the section that says “video lessons”. Click on this and then you will come to page that has a lot of video lessons already attached to it. If you don’t want to make your own, you can search what other people have done. Every time someone makes a video lesson, it is automatically shared on the website. So, take some time and have a look around. If you can’t find what you are looking for, then you will have to make your own. On the left of the screen you should see this –
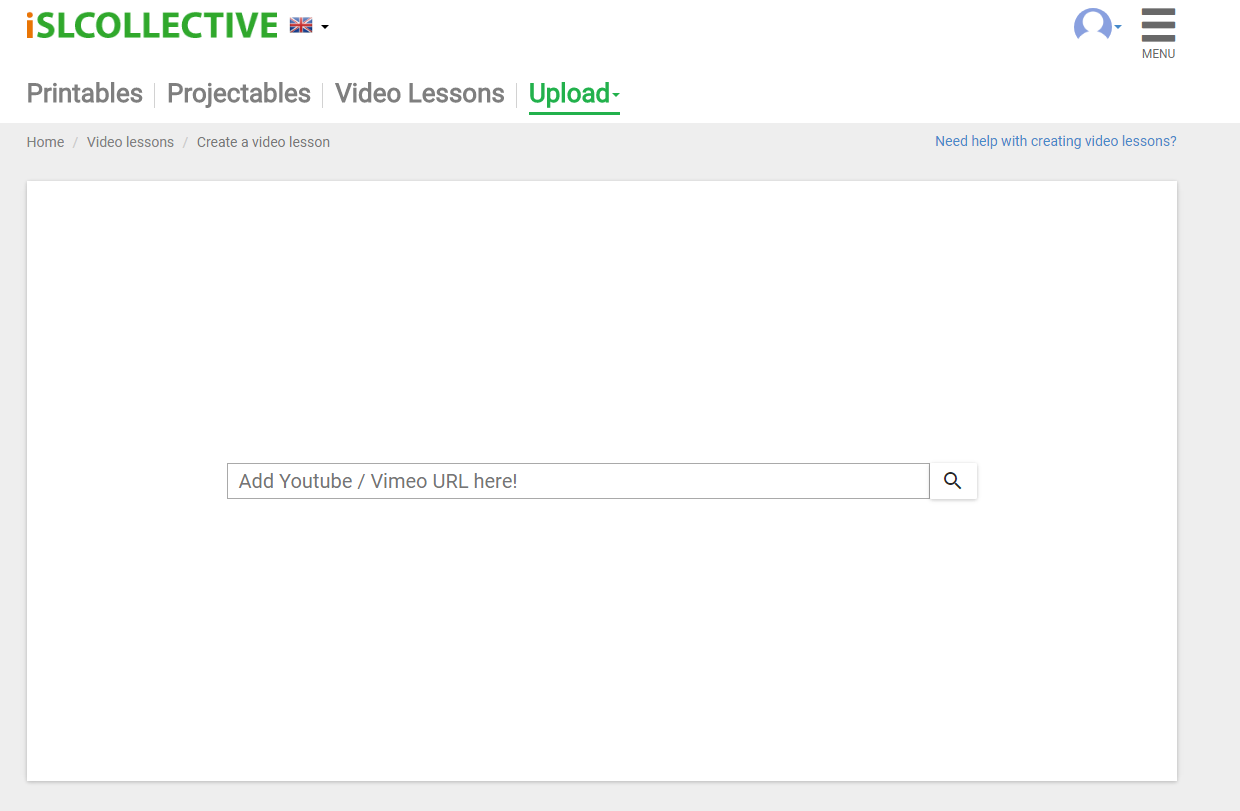
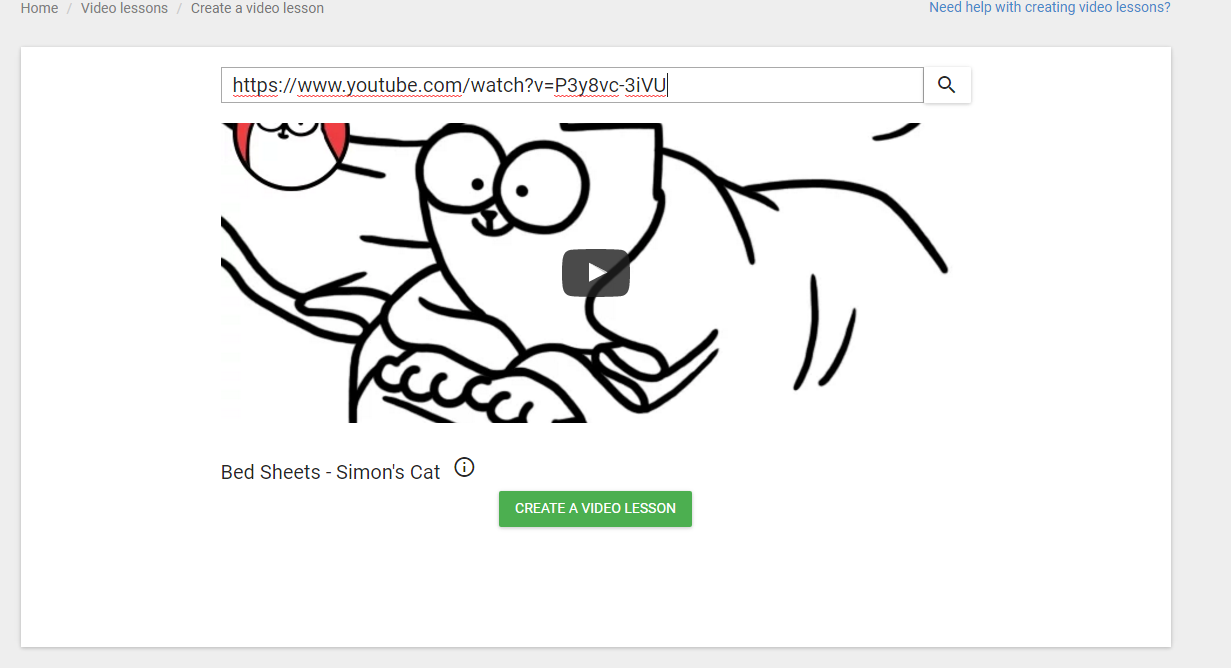
Click on “create a video lesson”. Once you’ve done this it will ask you for a YouTube URL. Now you will have to go to YouTube and find a suitable video you would like to use. Copy and paste the URL into the space provided. Now you should see your video appear. Hit the green “create a video lesson” button and away you go!
Adding questions and editing
Now you will want to add questions. You do this by watching the video and when you come to a section you want to add a question to you simply click on the orange circle on the left with a plus sign in it.

There will be four options available to you –
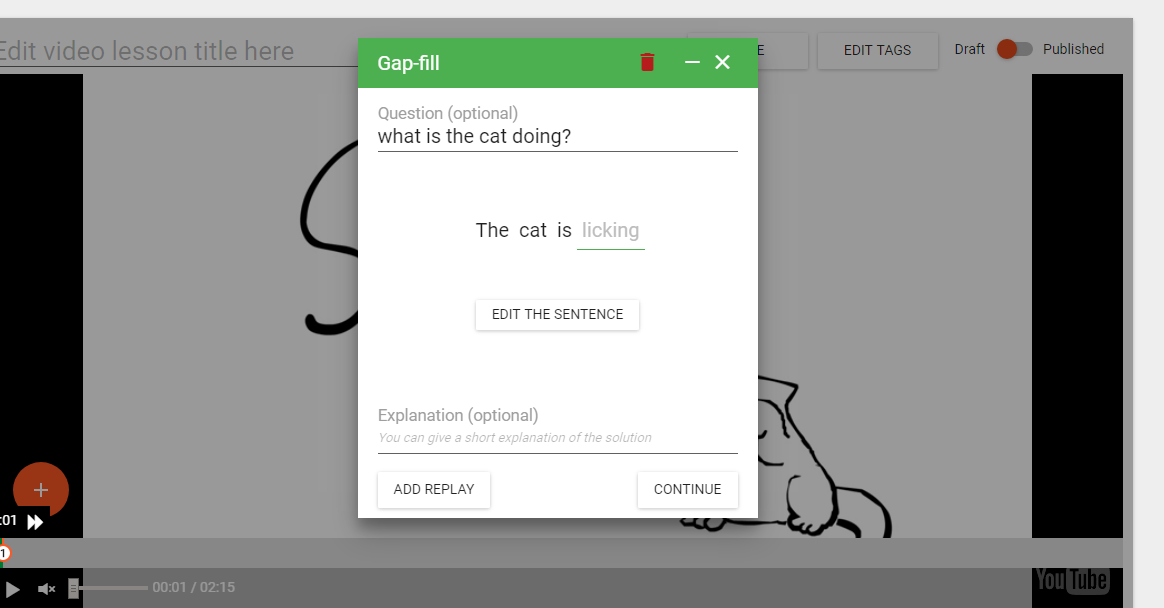
Gap fill questions – You will need to listen to part of the video and type out what is said. Then you click on “select
the gap” and then choose a word or phrase that you want the students to fill in when they watch.
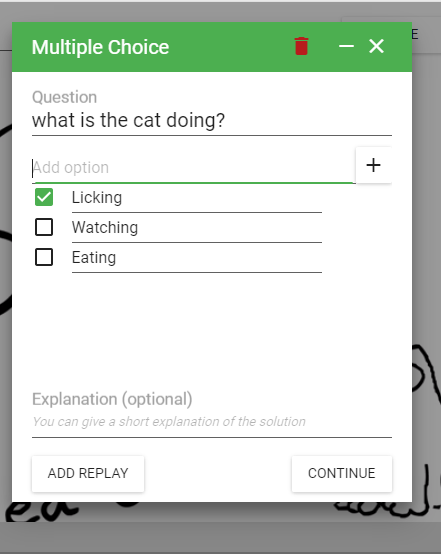
Multiple choice questions – The second choice of task is multiple choice questions. Like all multiple choice questions you make a question or statement and give as many choices as you want. However, it will not randomize the order of answers, so you will have to do that by yourself. If you do make a mistake, there is a small ‘bin’ icon on the right of each answer/question, so you can always delete any mistakes and start again.
Scramble sentence – The last question type is scrambled sentences. For this you will have to listen to a section of the video and type out what is said in the correct order. You then hit the continue button at the bottom right and the sentence will be scrambled for you.

Edit – The final choice is the edit button. Here you can remove sections of the video if you think it is inappropriate or if a section is not needed. This can be a bit tricky, but it is straight forward enough. First stop the video where you want the edit to begin by clicking on the orange circle. Then chose the edit option. A red line with two triangles will appear. Use the triangle on the right to adjust the length of the edit. Once you are done the video will continue. The students will not see the section of video you have removed.

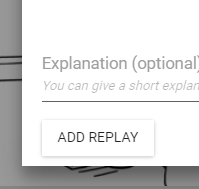
Add a replay – At the bottom of each question on the left, you will an icon that says “add a replay”. What this does is allow the students to go back and watch a small section again containing the answer. You will have to adjust the section that will be replayed, but this is similar to the “edit” section above. If you don’t want a replay, then you don’t need to touch this at all.

Finishing off
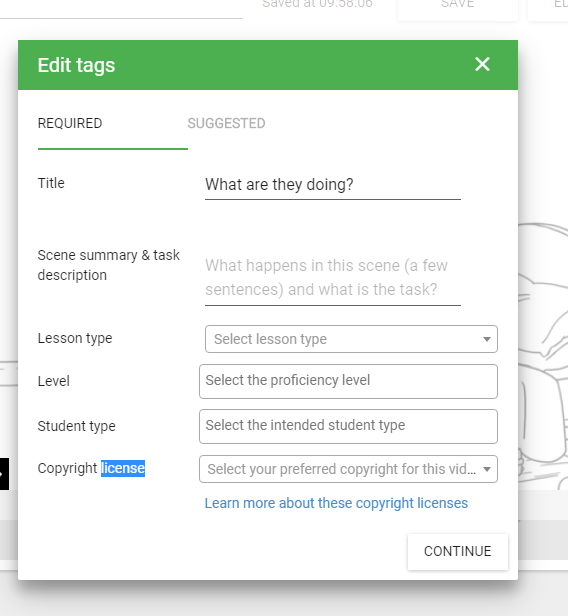
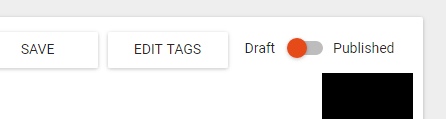
Finally, you will need to give your video a title and save it. You will also need to edit tags on the video. This is similar to kahoot, in that you give the video a quick description of what the video is about and what the language the video focuses on. You will also notice a copyright license near the bottom. It would be good for you to read through the choices. Some of the choices allow you to stop people from using too much of your work or if you don’t mind another teacher can use your video freely. It’s up to you. Lastly, at the top right you will see a small slider that moves your video from “draft” to “publish”. Once you move the slider over your video is now available to the public. You will be given a URL for your video, which you can then copy and paste onto BlackBoard.
Drawbacks
If you are using this on iPads, there have been a few issues that have crept up. First, it can take a long time for the video to load. Just be patient, it will load. Second, the videos don’t always work for everyone. This is a bit strange, especially if the students have similar iPads. The video will work on one but not the other. If you do have this problem, close the app or web browser they are using and try again. If the video continues not to work, then try a different browser or get the student to work with someone else. I’ve only ever had a maximum of three students in one class that the video would not work. However, we should be using laptops next year, so hopefully these problems won’t be an issue.
Hopefully you will find this useful. It is a bit tricky at first, but once you get the hang of creating and editing videos, I think this tool can be beneficial to our students.